Homemade Red Velvet Cheesecake
Introduction
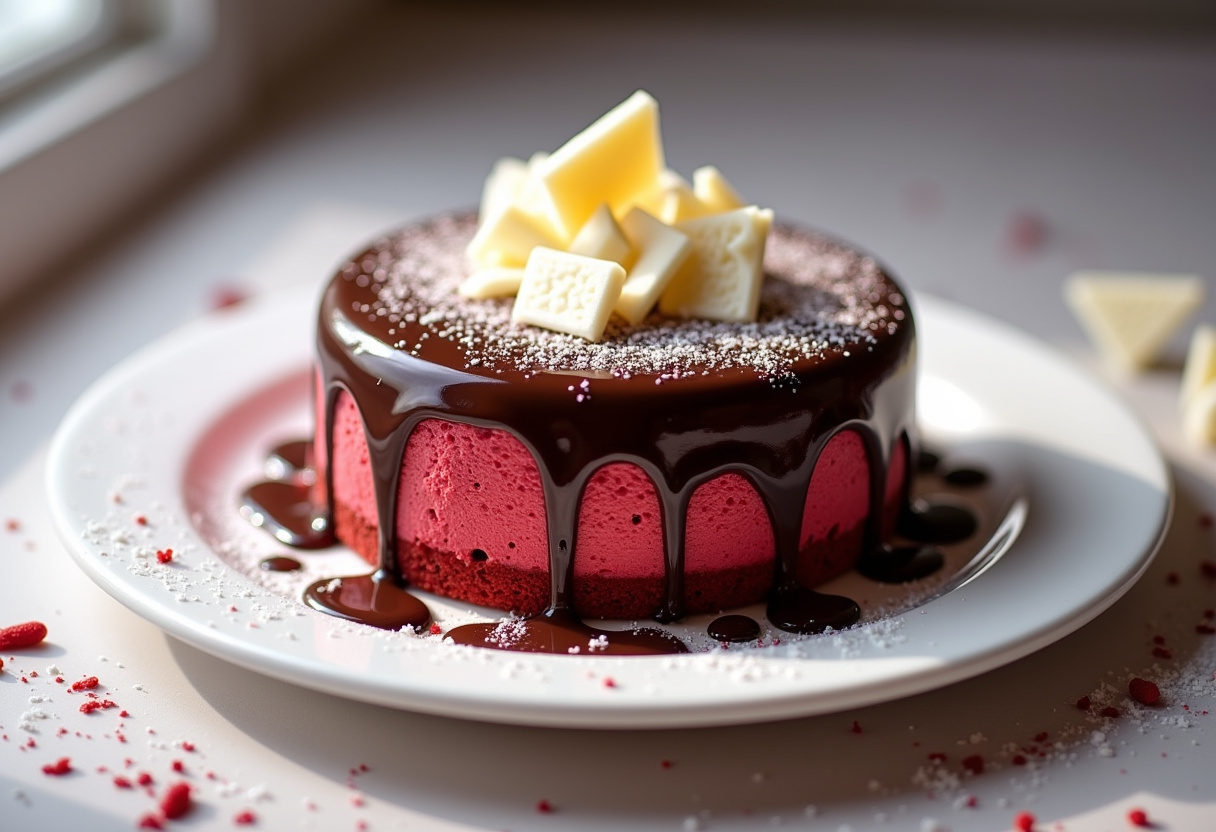
Elevate your dessert game with this indulgent Homemade Red Velvet Cheesecake recipe that beautifully combines the classic charm of red velvet cake with the creamy richness of cheesecake. Perfect for any occasion, this luxurious treat features a delectable Oreo crust, a velvety red velvet filling, and a smooth cream cheese frosting that will leave everyone craving for more.
Why choose this Homemade Red Velvet Cheesecake recipe?
Indulge in the best of both worlds with this Homemade Red Velvet Cheesecake, offering a delightful fusion of red velvet cake and luscious cheesecake. This recipe guarantees a decadent and visually stunning dessert that will impress your guests and satisfy your sweet cravings. Each bite is a symphony of flavors and textures that will make this cheesecake a standout on your dessert menu.
Ingredients for Homemade Red Velvet Cheesecake
- For the Crust:
- 2 ½ cups (250 g) crushed Oreo cookies (about 30 cookies)
- 5 tablespoons unsalted butter, melted
- For the Cheesecake:
- 32 ounces (908 g) cream cheese, softened
- 1 ⅓ cups (267 g) granulated sugar
- ½ cup (42 g) cocoa powder
- 1 cup (227 g) sour cream, room temperature
- 1 tablespoon white vinegar
- 1-2 ounces red food coloring
- 1 tablespoon vanilla extract
- 4 large eggs, room temperature, lightly beaten
- For the Frosting:
- 4 ounces (113 g) cream cheese, softened
- ¼ cup (56 g) unsalted butter, softened
- 2 cups (260 g) confectioners’ sugar
- 1 teaspoon vanilla extract
Preparation Steps for Homemade Red Velvet Cheesecake
Step 1: Preheat the Oven
Position the oven rack in the lower third position and preheat the oven to 350°F (175°C). Secure the outer bottom of a 9-inch springform pan with two layers of heavy-duty aluminum foil to prevent any leaks during baking.
Step 2: Make the Crust
In a bowl, combine the crushed Oreo cookies with melted butter. Press this mixture firmly into the bottom and along the sides of the prepared springform pan. Bake for 10 minutes, then allow it to cool while you prepare the cheesecake filling.
Step 3: Prepare the Cheesecake Filling
Lower the oven temperature to 300°F (150°C). Beat the softened cream cheese until smooth and creamy on medium-low speed for about 1 minute. Add granulated sugar and cocoa powder, mixing until thoroughly combined.
Step 4: Continue with the Cheesecake Filling
Integrate the sour cream, white vinegar, vanilla extract, and red food coloring into the cream cheese mixture, blending until smooth. Gently fold in the lightly beaten eggs, ensuring not to overmix the batter.
Step 5: Bake the Cheesecake
Pour the prepared cheesecake batter over the cooled crust in the springform pan. Place the pan inside a larger roasting pan and fill the roasting pan with boiling water halfway up the sides of the springform pan.
Step 6: Final Baking and Cooling
Bake the cheesecake for approximately 1 hour, or until the edges are set and the center slightly jiggles. Turn off the oven and leave the cheesecake in the water bath for an additional hour. Once done, remove from the water bath, cool on a wire rack, and refrigerate for at least 4 hours or overnight.
Step 7: Prepare the Frosting
Beat the softened cream cheese and butter until smooth and creamy. Gradually add confectioners’ sugar and vanilla extract, mixing until smooth and fluffy. Spread the frosting evenly over the chilled cheesecake just before serving.
Step 8: Serve the Homemade Red Velvet Cheesecake
Before serving, remove the sides of the springform pan, slice the cheesecake, and enjoy this decadent Homemade Red Velvet Cheesecake with its luscious cream cheese frosting. Indulge in every bite of this delightful dessert!
Health Benefits of Homemade Red Velvet Cheesecake
While Homemade Red Velvet Cheesecake is undoubtedly a decadent dessert, it does offer some health benefits when enjoyed in moderation. The cream cheese used in the recipe provides a good source of calcium and protein, while the cocoa powder adds antioxidants. Additionally, the red food coloring can bring a pop of color without significantly impacting the nutritional value. However, it’s important to be mindful of portion sizes due to the high sugar and fat content typical in cheesecakes.
Origin and History of the Homemade Red Velvet Cheesecake Recipe
The combination of red velvet cake and cheesecake in this delightful dessert is a modern twist on two classic favorites. Red velvet cake is believed to have originated in the United States in the early 20th century, with its signature reddish hue traditionally coming from the reaction between cocoa powder and acidic ingredients like buttermilk and vinegar. The addition of cream cheese frosting further enhances its appeal. The fusion of red velvet cake with creamy cheesecake likely emerged as a creative variation to elevate the dessert experience.
Delicious Variations Around Homemade Red Velvet Cheesecake
While the classic Homemade Red Velvet Cheesecake recipe is a crowd-pleaser, there are endless possibilities for creative variations to suit different tastes and occasions. Consider incorporating additional flavors like espresso or almond extract into the cheesecake filling for a unique twist. For a crunchy texture, mix chopped nuts or chocolate chunks into the crust. You can also experiment with different toppings such as fresh fruit compote, whipped cream, or a drizzle of salted caramel for added indulgence.
Chef’s Tips for Perfecting Your Homemade Red Velvet Cheesecake
1. Room Temperature Ingredients: Ensure that your cream cheese, eggs, and sour cream are at room temperature before mixing to achieve a smooth and creamy cheesecake batter.
2. Gentle Mixing: Avoid overmixing the batter once the eggs are added to prevent cracking and ensure a silky texture.
3. Water Bath Technique: Baking the cheesecake in a water bath helps regulate the temperature and prevents cracks on the surface. Be sure to wrap the springform pan securely with aluminum foil to prevent water leakage.
4. Cooling and Chilling: Allow the cheesecake to cool gradually to room temperature before refrigerating. Chilling it for at least 4 hours or overnight helps the flavors meld and sets the texture for the perfect slice.
5. Flavor Infusion: Experiment with different extracts such as almond or peppermint to add a unique flavor profile to your Homemade Red Velvet Cheesecake.
Mistakes to Avoid When Preparing Homemade Red Velvet Cheesecake
When making your Homemade Red Velvet Cheesecake, there are some common mistakes you’ll want to steer clear of to ensure a successful and delicious outcome. Avoid overmixing the batter, as this can lead to a dense and tough texture. Additionally, make sure to properly cool the cheesecake before serving to allow it to set and develop its flavors fully. Lastly, be cautious when adding red food coloring, as too much can alter the taste of the cheesecake.
Ingredient Alternatives for Homemade Red Velvet Cheesecake
While the standard ingredients for Homemade Red Velvet Cheesecake create a perfect balance of flavors, you can explore some alternatives to customize your dessert. For the crust, consider using chocolate graham crackers or chocolate wafer cookies instead of Oreo cookies for a different twist. In the filling, you can experiment with different types of cocoa powders or even add a hint of espresso powder for a richer taste. For the frosting, try incorporating a touch of almond extract or a splash of bourbon to elevate the flavors even further.
Tips and Tricks to Perfect Your Homemade Red Velvet Cheesecake
To take your Homemade Red Velvet Cheesecake to the next level, consider these expert tips and tricks. When mixing the cheesecake batter, make sure all your ingredients are at room temperature to achieve a smooth and creamy consistency. Use high-quality cocoa powder for a more intense chocolate flavor, and don’t skimp on the red food coloring to achieve that iconic red velvet hue. For the frosting, whip it until light and fluffy for a decadent topping that complements the cheesecake perfectly.
Side Dish Suggestions for Homemade Red Velvet Cheesecake
Pairing your Homemade Red Velvet Cheesecake with the right side dishes can enhance the overall dining experience. Consider serving a fresh fruit salad with berries and mint to add a refreshing contrast to the rich and creamy cheesecake. Alternatively, a dollop of whipped cream or a scoop of vanilla ice cream can complement the flavors of the dessert while providing a creamy and indulgent accompaniment. For a more decadent option, drizzle some warm chocolate sauce or caramel sauce over the cheesecake for an extra touch of sweetness.
FAQ about the recipe Homemade Red Velvet Cheesecake
How to store the recipe Homemade Red Velvet Cheesecake after cooking?
To store the Homemade Red Velvet Cheesecake after cooking, ensure it is completely cooled. Cover it with plastic wrap or aluminum foil to protect it from absorbing other odors in the refrigerator. It’s best to keep it in an airtight container to maintain its freshness. The cheesecake can be refrigerated for up to 5 days, maintaining its flavor and texture.
Can the recipe Homemade Red Velvet Cheesecake be prepared in advance?
Yes, you can prepare the Homemade Red Velvet Cheesecake in advance. In fact, it is recommended to refrigerate it for at least 4 hours or overnight after making it. This resting period allows the flavors to meld and the texture to set properly, enhancing the overall taste. You can also freeze the cheesecake for longer storage if needed.
What ingredients can be substituted in the recipe Homemade Red Velvet Cheesecake?
If you prefer to substitute ingredients in the Homemade Red Velvet Cheesecake recipe, you can explore various options. For the crust, you can replace Oreo cookies with graham crackers, chocolate cookies, or a nut-based crust. Similarly, for the filling, you can experiment with different types of cream cheese or sour cream to suit your preferences.
How to adapt the recipe Homemade Red Velvet Cheesecake for a vegetarian version?
To adapt the Homemade Red Velvet Cheesecake recipe for a vegetarian version, ensure all the ingredients used are vegetarian-friendly. Opt for cream cheese and butter substitutes that are plant-based. Check the labels of the cocoa powder, food coloring, and other components to ensure they do not contain any animal-derived ingredients.
Is the recipe Homemade Red Velvet Cheesecake suitable for children?
The Homemade Red Velvet Cheesecake can be suitable for children, but it’s essential to consider any dietary restrictions or allergies they may have. If serving it to children, you can adjust the sweetness level of the frosting by reducing the amount of confectioners’ sugar. Additionally, involve children in the preparation process under adult supervision for a fun and engaging baking experience.
Conclusion about the recipe Homemade Red Velvet Cheesecake
Indulge in the decadent fusion of red velvet cake and creamy cheesecake with this Homemade Red Velvet Cheesecake recipe. Whether for a festive celebration or a delightful dessert, this luscious treat is sure to captivate your taste buds. Elevate your dessert repertoire with this exquisite creation that combines elegance and richness in every bite.
📌 Save This Recipe and Explore More Culinary Delights!
Love this recipe? Don’t lose it! Pin it now on Pinterest to keep it within reach whenever you need a quick and delicious idea. Sharing it with your followers also helps spread the love for easy and flavorful home cooking!
💡 Whether you’re planning your next weeknight dinner or preparing a special meal for guests, having your favorite recipes saved makes cooking easier and more enjoyable. Pinterest is a great way to organize your meal ideas, try new twists on classics, and come back to those dishes you can’t get enough of.
📲 While you’re there, be sure to follow our Pinterest page to get inspired by our latest creations — from comforting one-pot meals to healthy quick-fix ideas, seasonal treats, and much more. We regularly share new recipes that are simple, delicious, and perfect for everyday cooking.
📖 Ready for more inspiration? Visit our complete recipe archive on our dedicated recipe page. You’ll find dozens of easy-to-follow recipes designed to save you time in the kitchen while bringing great flavors to your table. Whether you’re a beginner or a seasoned cook, there’s something for everyone to explore!
✨ Don’t forget to bookmark your favorites and come back often — we’re always cooking up something new and exciting!