Follow Me On Social Media!
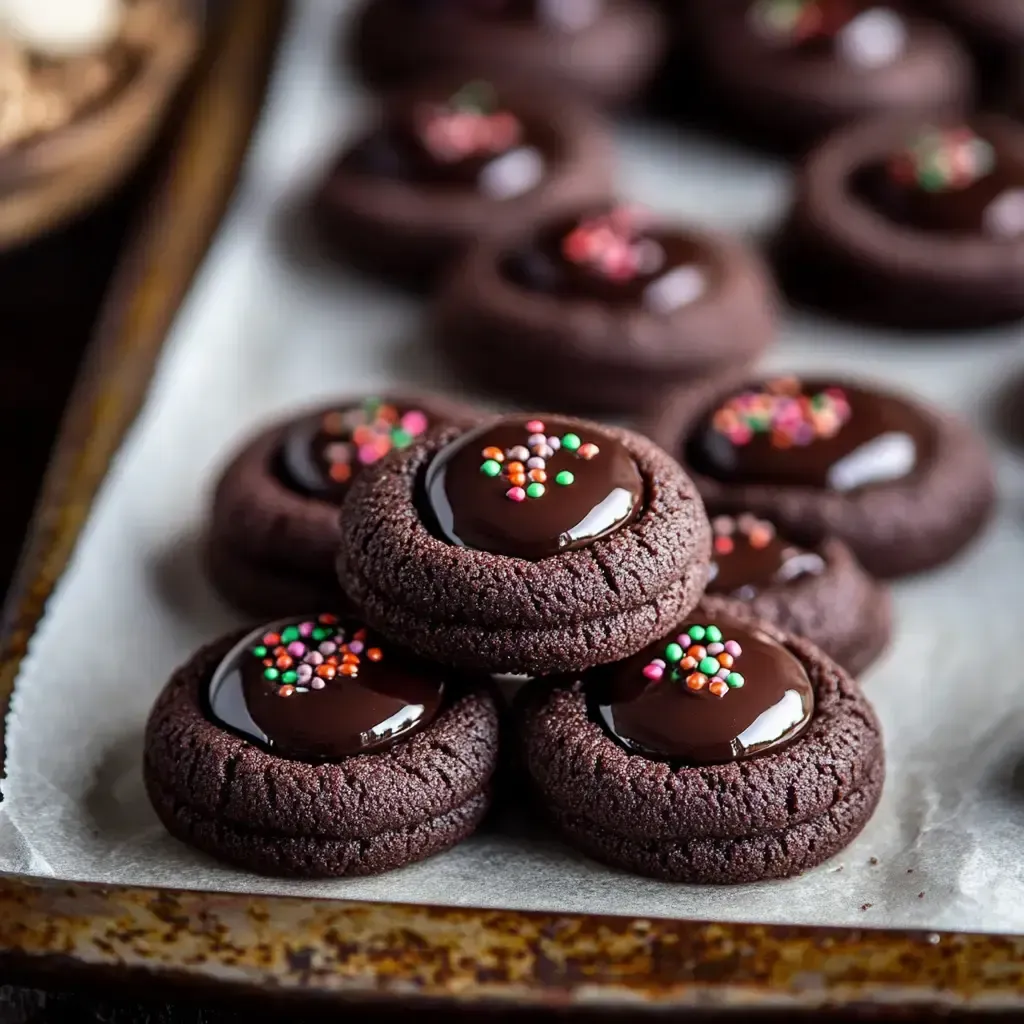
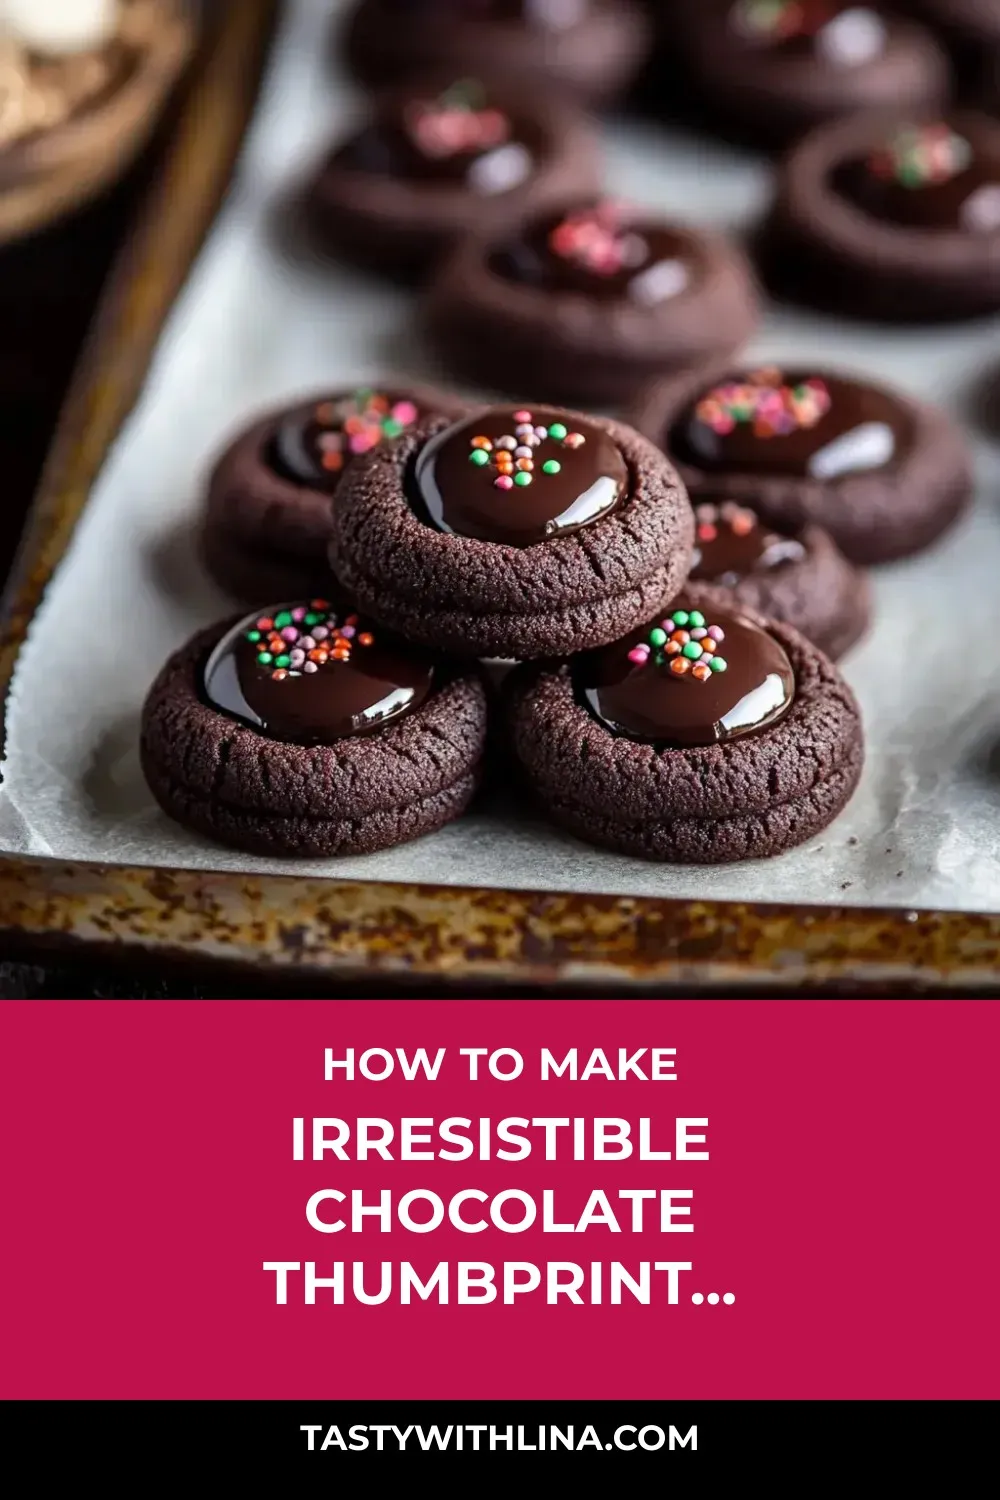
Welcome to a delightful baking adventure with a twist: Chocolate Thumbprint Cookies! These little treats are a chocolate lover’s dream come true, with a rich cocoa-infused dough and a surprise filling in the center. I stumbled upon this recipe while on a quest to make the ultimate chocolatey delight, and oh boy, did I hit the jackpot! The aroma of these cookies baking in the oven is simply irresistible, drawing everyone to the kitchen like moths to a flame.
As I perfected the art of crafting these Chocolate Thumbprint Cookies, I learned a few tricks of the trade that I’m excited to share with you. From letting the eggs come to room temperature for easier mixing to the importance of chilling the dough before baking, each step plays a crucial role in creating the perfect cookie. And let’s not forget the fun part – creating the thumbprint wells and experimenting with different fillings like white chocolate, peanut butter, mint, or caramel. The possibilities are endless, and each variation brings its own delicious twist to the table.
So, roll up your sleeves, preheat your oven, and get ready to embark on a baking journey filled with chocolatey goodness. Whether you’re baking these cookies for a special occasion or simply craving a sweet treat, these Chocolate Thumbprint Cookies are sure to steal the spotlight and become a family favorite in no time. Get ready to indulge in a symphony of flavors and textures that will leave you craving for more!
Quick Benefits
- Perfect for Baking with Kids: Get the whole family involved in making these fun thumbprint cookies and enjoy the process together.
- Versatile Fillings: Experiment with different fillings like white chocolate, peanut butter, mint extract, or caramel to customize your cookies.
- Make-ahead and Freezer Friendly: Prepare the cookies in advance and freeze them for later, perfect for parties or satisfying sudden dessert cravings.
- Tips for Perfect Cookies: Learn key tips like letting ingredients come to room temperature, chilling the dough, and adjusting cookie shapes for the best results.
Why You’ll Love This Irresistible Chocolate Thumbprint Cookies Recipe Recipe
- Decadent Chocolate Flavor: Indulge in the rich, double chocolate taste of these thumbprint cookies with a combination of chocolate chips and cocoa powder.
- Fun Baking Activity: Enjoy making these cookies with your family, especially kids who will love creating the thumbprint dents and decorating with sprinkles.
- Versatile Fillings: Experiment with different fillings like white chocolate, peanut butter, mint extract, or caramel for a variety of flavors.
- Storage and Freezing Tips: Easily store these cookies for up to a week or freeze them for a month, making them a convenient treat for unexpected cravings or parties.
- Helpful Baking Tips: Follow expert tips such as using room temperature ingredients, properly measuring flour, and chilling the dough to ensure perfect cookies every time.
Ingredients for Irresistible Chocolate Thumbprint Cookies Recipe
- 1/2 cup (40g) cocoa powder, Dutch process.
- 3/4 cup (165g) packed light brown sugar.
- 1/2 teaspoon salt.
- 2 egg yolks, warmed to room temp.
- 1 1/2 teaspoons vanilla flavoring.
- 1 1/2 cups (188g) plain all-purpose flour.
- Decorative sprinkles, optional.
- 1/4 cup (50g) white sugar.
- 3/4 cup (168g) unsalted butter, brought to room temp.
- 1 cup (200g) semi-sweet chocolate chips.
- 1/2 cup heavy whipping cream.
- 1/2 teaspoon baking powder.
Pro Tips for Irresistible Chocolate Thumbprint Cookies Recipe
Pro tips for making these Chocolate Thumbprint Cookies:
1. To ensure your cookies turn out soft and light, avoid packing in too much flour by either spooning it into your measuring cup or weighing it out.
2. Don’t skip chilling the dough before baking to prevent the cookies from spreading too much on the sheet. This step also helps maintain the thumbprint shape during baking.
3. Take advantage of the versatility of this recipe by experimenting with different fillings like white chocolate, peanut butter, mint extract, or caramel. Just be prepared for potential messiness with the caramel filling, but the delicious results make it worthwhile!
How to Make Irresistible Chocolate Thumbprint Cookies Recipe
Step 1: Prep
Prepare baking pans with parchment paper. Combine flour, cocoa, salt, and baking powder in a bowl.
Step 2: Make Dough
Cream together butter, sugars until creamy. Add yolks, vanilla, then stir in dry ingredients until combined.
Step 3: Shape
Divide the dough into 34 balls, gently press the center of each with a 1/4 teaspoon to create a dip, then refrigerate for an hour.
Step 4: Bake
Bake cookies at 350°F for 9 to 11 minutes. Gently reshape any indentations while cookies are still warm.
Step 5: Make Ganache
Pour hot cream over chocolate chips and let sit for one minute. Stir until smooth and shiny.
Step 6: Finish
Fill the cookie dips with the ganache. Sprinkle optional toppings. Refrigerate for 10-15 minutes to set.
📌 Pin for later!
Storage Tips
To store Chocolate Thumbprint Cookies, allow them to cool completely before transferring them to an airtight container. Layer the cookies between sheets of wax paper to prevent sticking. If you plan to consume the cookies within a week, store them at room temperature. However, if you want to extend their shelf life, you can freeze the baked cookies without filling for up to a month or two. Just remember to thaw them and add the filling before serving.
When freezing the cookies, ensure they are in a freezer-safe container or a zip-top bag to maintain freshness. Label the container with the date to keep track of how long they have been stored. When ready to enjoy, allow the cookies to thaw at room temperature and fill them with your desired filling. This storage method is convenient for preparing ahead for gatherings or satisfying unexpected dessert cravings.
Ingredient Substitutions
If you’re looking to make some ingredient substitutions for the chocolate thumbprint cookies, there are a few options to consider. For the chocolate chips, you can swap semi-sweet for milk or dark chocolate chips based on your preference. If you’re out of Dutch process cocoa powder, you can use natural cocoa powder instead, but keep in mind that it might slightly alter the flavor and appearance of the cookies.
In place of unsalted butter, you can use salted butter but reduce the additional salt in the recipe to maintain the right balance. If you’re out of heavy whipping cream, you can substitute it with whole milk or half-and-half, though the texture of the dough may vary slightly. Additionally, feel free to experiment with different fillings for the thumbprint cookies, such as white chocolate, peanut butter, mint extract, or caramel, to create a variety of flavors that suit your taste preferences.
Serving Suggestions
For a creative serving suggestion with these double chocolate thumbprint cookies, try arranging them on a dessert platter in a beautiful pattern, alternating between the different fillings like white chocolate, peanut butter, mint, and caramel. This not only adds variety but also makes for a visually appealing presentation that will delight your guests. To enhance the experience, sprinkle some decorative sprinkles on top of the cookies before serving for an extra touch of color and fun!
Another fun idea is to create a cookie decorating station with various toppings like crushed nuts, mini marshmallows, colorful sprinkles, and drizzles of melted chocolate or caramel. Let your guests customize their own thumbprint cookies with their favorite fillings and toppings. This interactive and creative approach adds an element of fun to the dessert experience and allows everyone to tailor their treats to their own preferences. It’s a great way to engage guests of all ages and make dessert time a memorable and enjoyable activity!
FAQs for Irresistible Chocolate Thumbprint Cookies Recipe
FAQ: Can I use natural cocoa instead of Dutch process cocoa in this recipe?
You can swap out Dutch process cocoa for natural cocoa, but keep in mind that the cookies will look and taste slightly different. Dutch process cocoa gives the cookies a darker and smoother taste.
FAQ: How should I store these chocolate thumbprint cookies?
If sealed, the cookies are good for about a week, but they might not last that long! Stack them with wax paper to prevent sticking. You can also freeze baked cookies without the filling for a month or two, just remember to thaw and fill them later.
FAQ: Why is it important to chill the cookie dough before baking?
Chilling the dough is crucial to prevent the cookies from spreading too much in the oven and to help the thumbprint spots maintain their shape. Skipping this step could result in flat cookies with distorted thumbprints.
FAQ: How do I fix the shape of the cookies if they spread too much or if the thumbprint spots puff up while baking?
To fix the cookie shape, work on it right out of the oven while the cookies are still soft and bendy. You can use a cutter to get perfect rounds or press back the thumbprint spots before the cookies cool and set.
Conclusion
After indulging in the delightfully rich and chocolatey goodness of these Chocolate Thumbprint Cookies, I hope you’ve discovered a new favorite treat to share with loved ones. Remember, the best part of baking is not just enjoying the end result, but creating memories in the kitchen with those you care about. So gather your family, friends, or neighbors, and let the sweet aroma of these cookies bring everyone together for a fun baking session!
Whether you decide to stick with the classic chocolate filling or get creative with various flavor combinations, these Chocolate Thumbprint Cookies are sure to be a hit at any gathering or as a special treat just for yourself. So keep experimenting, keep baking, and most importantly, keep spreading the joy of homemade goodies with everyone around you. Happy baking, and enjoy every delicious bite of these delectable Chocolate Thumbprint Cookies!
📌 Pin for later!
Irresistible Chocolate Thumbprint Cookies Recipe
Indulge in rich and chocolatey thumbprint cookies, perfect for baking with the whole family and customizing with various fillings!
Prep Time15 Minutes
Cook Time70 Minutes
Total Time85 Minutes
CuisineAmerican
Skill LevelEasy
Servings34 Servings (34 cookies)
Ingredients
- 1/2 cup (40g) cocoa powder, Dutch process.
- 3/4 cup (165g) packed light brown sugar.
- 1/2 teaspoon salt.
- 2 egg yolks, warmed to room temp.
- 1 1/2 teaspoons vanilla flavoring.
- 1 1/2 cups (188g) plain all-purpose flour.
- Decorative sprinkles, optional.
- 1/4 cup (50g) white sugar.
- 3/4 cup (168g) unsalted butter, brought to room temp.
- 1 cup (200g) semi-sweet chocolate chips.
- 1/2 cup heavy whipping cream.
- 1/2 teaspoon baking powder.
Instructions
-
Prep: Prepare baking pans with parchment paper. Combine flour, cocoa, salt, and baking powder in a bowl.
-
Make Dough: Cream together butter, sugars until creamy. Add yolks, vanilla, then stir in dry ingredients until combined.
-
Shape: Divide the dough into 34 balls, gently press the center of each with a 1/4 teaspoon to create a dip, then refrigerate for an hour.
-
Bake: Bake cookies at 350°F for 9 to 11 minutes. Gently reshape any indentations while cookies are still warm.
-
Make Ganache: Pour hot cream over chocolate chips and let sit for one minute. Stir until smooth and shiny.
-
Finish: Fill the cookie dips with the ganache. Sprinkle optional toppings. Refrigerate for 10-15 minutes to set.