Cake in a Jar
Introduction
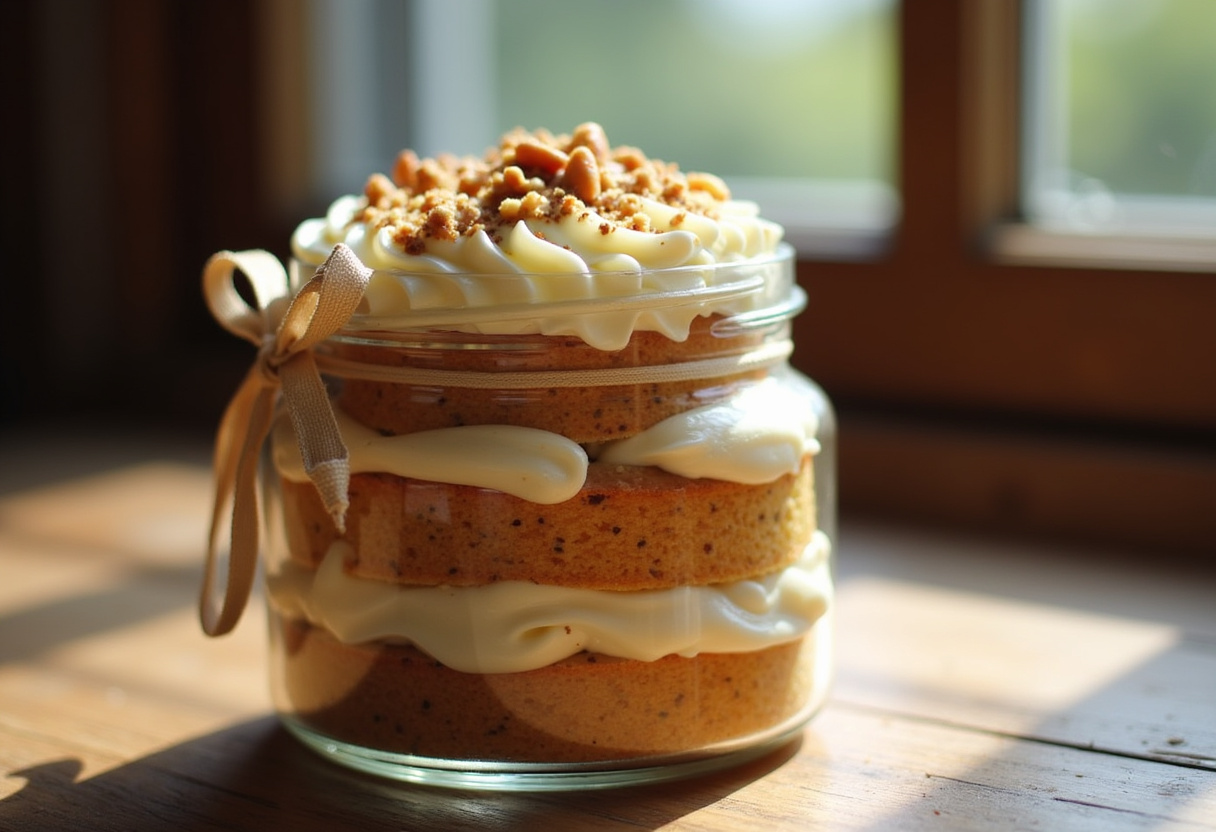
Cake in a jar is a delightful and innovative way to savor individual portions of cake. These jars are filled with moist, flavorful cake and topped with frosting, offering a conveniently portable dessert option. Whether you’re preparing for a gathering, looking for a thoughtful gift, or simply treating yourself, these cake jars add a personalized touch to your dessert experience.
Why choose this Cake in a Jar recipe?
One of the key reasons to choose this Cake in a Jar recipe is its simplicity and adaptability. The beauty of this recipe lies in baking the cake directly in the jar, eliminating the need for slicing or plating. Decorating each jar with frosting allows for customization to suit your preferences. Additionally, these jars are ideal for gifting, especially when you want to present a homemade dessert. Both children and adults enjoy these cakes, and the jar packaging ensures convenience and neatness. Moreover, by changing the cake mix and frosting combinations, you can create a variety of flavors effortlessly.
Ingredients for Cake in a Jar
- 1 box of cake mix (any flavor)
- 1 cup of water
- 1/3 cup of vegetable oil
- 3 large eggs
- 1/2 cup of frosting (any flavor)
- 6-8 small mason jars (or any glass jars with a lid)
Preparation Steps for Cake in a Jar
Step 1: Preparing the Mason Jars
To start, preheat the oven to 350°F (175°C) and lightly grease the insides of the mason jars using cooking spray or butter. This step ensures that the cakes will release smoothly after baking.
Step 2: Mixing the Cake Batter
In a large bowl, combine the cake mix, water, vegetable oil, and eggs. Follow the instructions provided on the cake mix box to prepare a well-mixed batter. Consistency is key to ensure even baking.
Step 3: Filling the Jars
Pour the prepared cake batter into each mason jar, filling them approximately halfway. Leaving space for the cake to rise as it bakes is essential to prevent overflow and ensure proper baking.
Step 4: Baking the Cakes
Arrange the filled jars on a baking sheet and place them in the preheated oven. Bake for 25-30 minutes until the cakes are cooked through. To check for doneness, insert a toothpick into the center of a cake; if it comes out clean, the cakes are ready.
Step 5: Cooling and Frosting
Allow the cakes to cool completely inside the jars. Once cooled, top each cake with a generous amount of frosting. You can apply the frosting using a piping bag for a precise finish or a spoon for a more rustic look.
Step 6: Serving the Cake in a Jar
After frosting, seal each jar with its lid and serve the cakes as individual, portable portions. These cakes are perfect for sharing or enjoying on the go, adding a touch of charm to any occasion.
Health Benefits of Cake in a Jar
Cake in a jar may not be the first thing that comes to mind when thinking about health benefits, but there are some surprising advantages to this delightful treat. The individual portion sizes can help with portion control, making it easier to enjoy a sweet treat without overindulging. Additionally, the controlled environment of the jar helps to preserve the freshness of the cake, ensuring that each bite is moist and delicious.
Origin and History of the Cake in a Jar Recipe
The concept of cake in a jar dates back to the mid-20th century when resourceful cooks sought ways to preserve baked goods for longer periods. By layering cake and frosting in a sealed jar, they discovered that the dessert stayed fresh and flavorful for an extended time. Today, this trend has evolved into a popular DIY gift and party favor, loved for its convenience and charm.
Delicious Variations Around Cake in a Jar
- Cake Flavor: Experiment with different cake mixes like chocolate, vanilla, or funfetti to create diverse flavor profiles.
- Frosting Flavors: Try various frosting types such as buttercream, cream cheese, chocolate ganache, or whipped cream for a personalized touch.
- Mix-Ins: Enhance your cake by adding ingredients like chocolate chips, sprinkles, or fruit before baking.
- Toppings: Get creative with toppings like crushed cookies, nuts, caramel, or chocolate syrup to elevate the visual appeal and taste.
Chef’s Tips for Perfecting Your Cake in a Jar
To ensure your cake in a jar turns out perfectly every time, consider these tips:
- Grease the inside of the jars lightly to ease cake removal after baking.
- Fill the jars only halfway with batter to allow room for the cake to rise.
- Customize each jar with frosting by piping or spreading it neatly for a professional finish.
- Layer frosting and cake inside the jar for a visually appealing presentation.
- Experiment with different flavor combinations for a unique and personalized dessert experience.
Ingredient Alternatives for Cake in a Jar
If you’re looking to switch things up with your Cake in a Jar recipe, there are plenty of ingredient alternatives you can explore. Here are some creative swaps you can try:
- Experiment with different cake mixes to create new flavor combinations.
- Substitute the water in the recipe with flavored liquids like fruit juice for added taste.
- Try using alternative oils like melted butter or coconut oil for a twist in texture.
- Explore unique frosting options such as cream cheese frosting, ganache, or even a drizzle of honey.
Tips and Tricks to Perfect Your Cake in a Jar
Mastering the art of Cake in a Jar requires attention to detail and some handy tips and tricks. Here are some suggestions to help you perfect your dessert creation:
- Ensure your jars are clean and dry before adding the cake batter to avoid any contamination.
- Don’t overfill the jars with batter to allow room for the cake to rise while baking.
- Consider adding mix-ins like chocolate chips or chopped nuts for added texture and flavor.
- Decorate the top of your cakes with a sprinkle of colored sugar or edible flowers for a visually appealing presentation.
Side Dish Suggestions for Cake in a Jar
While Cake in a Jar is a delightful standalone treat, pairing it with the right side dish can elevate the overall dining experience. Here are some side dish suggestions to complement your sweet jar cakes:
- Vanilla bean ice cream for a classic and indulgent pairing.
- Fresh berries or a fruit salad to add a refreshing contrast to the rich cake flavors.
- A dollop of whipped cream or a drizzle of caramel sauce for an extra touch of decadence.
- A cup of hot coffee or a glass of cold milk to balance the sweetness of the cakes.
FAQ about the recipe Cake in a Jar
Can I use a different type of jar for this recipe?
Yes! I’ve used other types of glass jars, and even small glass containers, for this recipe. Just make sure the jars are oven-safe before using them.
Can I make these cakes ahead of time?
Absolutely! I love making these cakes a day or two in advance, as they stay fresh in the jars. They’re perfect for prepping ahead of a party or event.
Can I freeze these cakes?
Yes, you can freeze the cakes in the jars. Once they’re fully cooled, seal the jars tightly and store them in the freezer for up to 2 months. When you’re ready to enjoy, simply let the jar thaw in the fridge overnight.
Do I need to grease the inside of the jars?
I highly recommend greasing the inside of the jars, as it helps the cakes come out more easily once they’ve baked. A light spray of cooking spray or a small amount of butter will do the trick.
What if I don’t have mason jars?
If you don’t have mason jars, you can use any oven-safe glass container with a lid. Make sure the container can withstand the baking temperature before using it for this recipe.
Conclusion about the recipe Cake in a Jar
Cake in a jar is a delightful and convenient way to enjoy delicious cake individually. Whether for special occasions or everyday treats, these portable desserts bring joy with every bite. Get creative with flavors and decorations to make each jar a unique masterpiece. With simple storage and reheating options, this recipe is a must-try for cake lovers looking for a fun twist on traditional desserts.
📌 Save This Recipe and Explore More Culinary Delights!
Love this recipe? Don’t lose it! Pin it now on Pinterest to keep it within reach whenever you need a quick and delicious idea. Sharing it with your followers also helps spread the love for easy and flavorful home cooking!
💡 Whether you’re planning your next weeknight dinner or preparing a special meal for guests, having your favorite recipes saved makes cooking easier and more enjoyable. Pinterest is a great way to organize your meal ideas, try new twists on classics, and come back to those dishes you can’t get enough of.
📲 While you’re there, be sure to follow our Pinterest page to get inspired by our latest creations — from comforting one-pot meals to healthy quick-fix ideas, seasonal treats, and much more. We regularly share new recipes that are simple, delicious, and perfect for everyday cooking.
📖 Ready for more inspiration? Visit our complete recipe archive on our dedicated recipe page. You’ll find dozens of easy-to-follow recipes designed to save you time in the kitchen while bringing great flavors to your table. Whether you’re a beginner or a seasoned cook, there’s something for everyone to explore!
✨ Don’t forget to bookmark your favorites and come back often — we’re always cooking up something new and exciting!