Follow Me On Social Media!
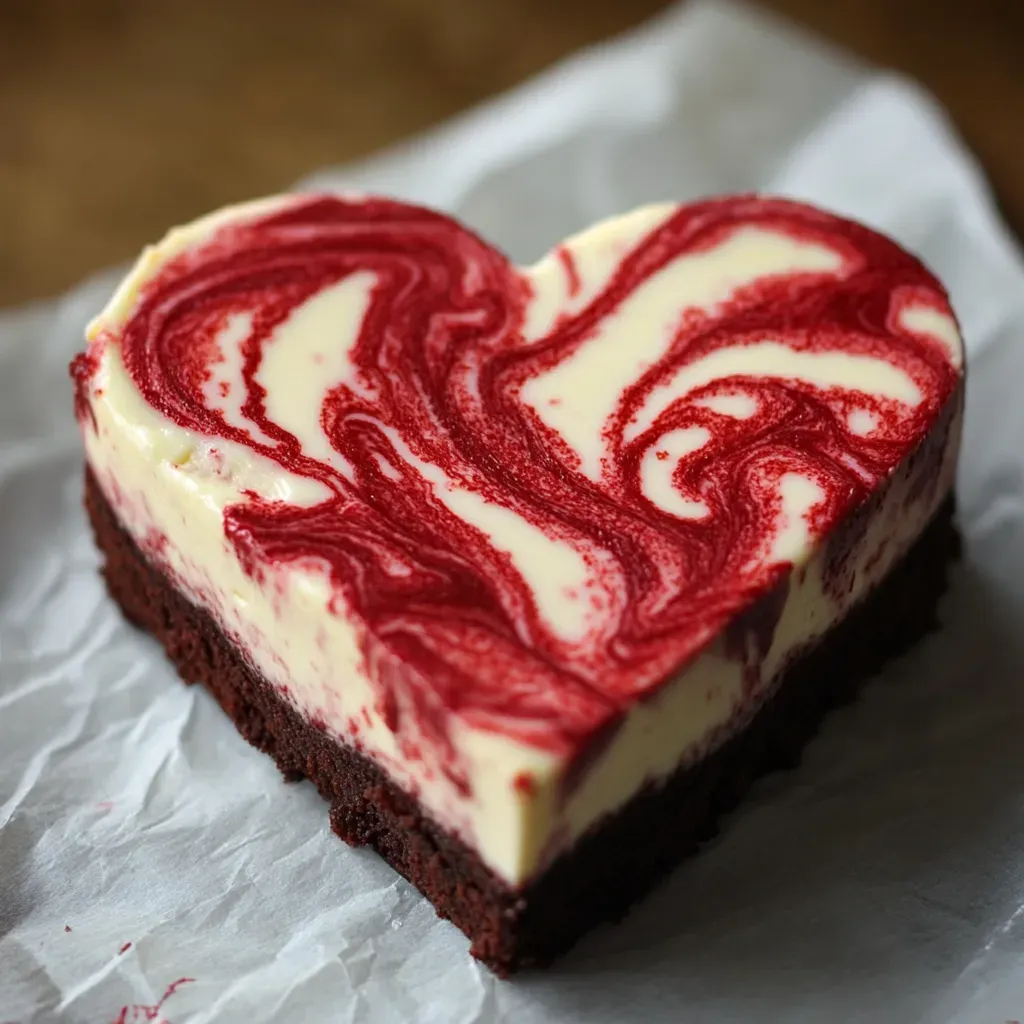
Indulge in a delightful fusion of flavors and textures with our exquisite recipe for Sweet Velvet Hearts with Cheesecake. This decadent dessert combines the rich allure of red velvet cake with the creamy deliciousness of cheesecake, resulting in a treat that’s as stunning as it is scrumptious.
I remember the first time I baked these Sweet Velvet Hearts with Cheesecake for a special occasion – the oohs and aahs that filled the room as I revealed the vibrant red layers paired with the velvety cheesecake topping were truly unforgettable. It’s a dessert that never fails to impress and delight, making it perfect for celebrations and gatherings.
Creating these Sweet Velvet Hearts with Cheesecake is more than just following a recipe; it’s a labor of love that culminates in a show-stopping masterpiece. The careful layering of flavors and textures, the attention to detail in each step – it all comes together to create a dessert that not only tantalizes the taste buds but also warms the heart. Whether it’s a birthday bash or a cozy family dinner, this dessert is sure to be a crowd-pleaser that leaves everyone craving for more.
Quick Benefits
- Eye-catching dessert with beautiful contrasting layers
- Mouthwatering blend of red velvet cake and velvety cheesecake
- Perfect for special occasions and celebrations
- Brings smiles around the table
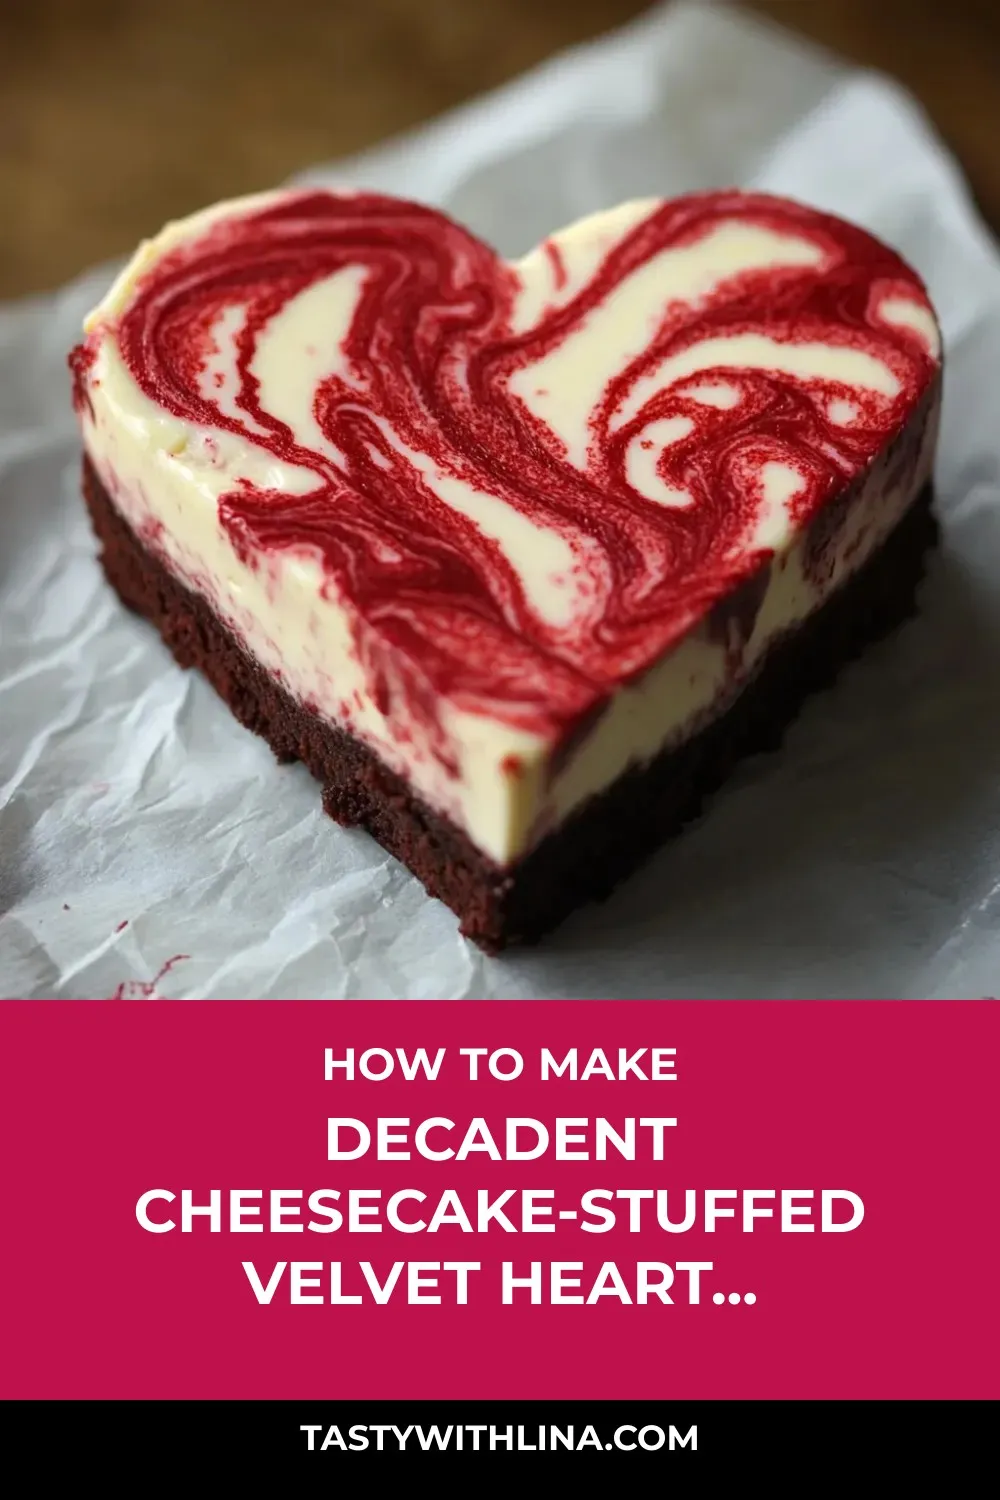
Why You’ll Love This Decadent Cheesecake-Stuffed Velvet Heart Cookies Recipe
- Eye-Catching Presentation: This dessert is as visually stunning as it is delicious, with vibrant red velvet cake layered beneath velvety smooth cheesecake, making it a showstopper at any event.
- Perfect for Special Occasions: Whether it’s a birthday, holiday dinner, or a simple treat-yourself moment, this Red Velvet Cheesecake is the ideal dessert to impress your guests or loved ones.
- Memorable Reactions: The contrast between the bright red cake and the white cheesecake layers never fails to elicit amazed reactions from guests, making it a memorable experience every time you serve it.
- Photograph-Worthy: The beautiful layers of this cheesecake are so visually appealing that guests will likely reach for their cameras before even taking a bite, making it perfect for social media-worthy dessert posts.
- Family Favorite: This dessert has the power to create magical moments, like the joy on your daughter’s face when she sees the perfect red and white layers, making it a go-to treat for all special family occasions.
- Traditional with a Twist: By combining the classic flavors of red velvet cake and cheesecake in a new and creative way, this recipe showcases how innovation can lead to creating something truly special and delicious.
- Labor of Love: Grandma’s wisdom rings true as the care taken in each step of making this cheesecake results in perfect, beautiful slices that make all the effort and time spent in the kitchen totally worth it.
Ingredients for Decadent Cheesecake-Stuffed Velvet Heart Cookies
Brownie Foundation
- 5 tablespoons butter (cut into 5 chunks)
- 4 ounces chopped semi-sweet chocolate
- 1/4 teaspoon salt
- 1/2 cup tightly packed dark brown sugar
- 1 fluid ounce red food coloring (one small bottle usually works)
- 1/2 cup all-purpose flour
- 2 whole eggs
- 1/4 teaspoon baking powder
Cheesecake Mixture
- 2 whole eggs
- 8 ounces cream cheese, softened
- 1 tablespoon all-purpose flour
- 2/3 cup granulated sugar
- 1/4 cup unflavored greek yogurt
- 1 tablespoon vanilla extract
Finishing Touch
- Red crystal sugar sprinkles
Pro Tips for Decadent Cheesecake-Stuffed Velvet Heart Cookies
To achieve the stunning contrast between the red velvet base and the creamy cheesecake layer in this Red Velvet Cheesecake recipe, ensure you carefully layer the cheesecake mixture on top of the red velvet batter. Use a spatula to gently spread the cheesecake mixture evenly over the cake batter to create distinct layers that will be visible when sliced.
When baking the Red Velvet Cheesecake, make sure to keep a close eye on it in the oven. To prevent overbaking and ensure a moist and velvety texture, consider using a water bath by placing a larger baking dish filled with hot water on the rack below the cheesecake. This method helps regulate the oven temperature and provides gentle heat that prevents cracking and drying out the cheesecake.
For a final decorative touch, sprinkle red crystal sugar on top of the cheesecake before baking. This not only adds a pop of color but also a delightful crunch and sweetness to complement the rich flavors of the red velvet and cheesecake layers. Enjoy the magical moment of slicing into this beautiful dessert and capturing the reactions of your guests as they admire the vibrant layers before indulging in each delicious bite.
How to Make Decadent Cheesecake-Stuffed Velvet Heart Cookies
Step 1: Get Ready
Preheat the oven to 350°F (175°C) and grease a 9-inch round springform pan with butter or shortening.
Step 2: Create Brownie Base
1. Boil water in a pot. In a separate bowl, combine flour, baking powder, and salt. Place butter and chocolate in a heat-safe bowl over the simmering water, stirring occasionally until melted. Allow it to cool slightly. Mix in sugar, eggs, and red food coloring. Gently fold in the dry ingredients until smooth.
Step 3: Whip Up Cheesecake Mix
Start the stand mixer with the paddle attachment. Combine cream cheese and yogurt until light and creamy. Blend in sugar and vanilla until smooth. Add eggs one at a time, ensuring each is fully incorporated. Mix in flour until smooth.
Step 4: Stack It Up
Set aside 1/4 cup of brownie mix. Spread the remaining mix evenly in a greased pan. Layer the cheesecake mix on top. Sprinkle the reserved brownie mix over the layers. Use a butter knife to swirl and create marble patterns.
Step 5: Cook It
Bake in a preheated oven for approximately 30 minutes, or until the cheesecake is firm and the edges turn golden.
Step 6: Let It Rest
Allow the cheesecake to cool for 30 minutes, then remove from the springform pan. Sprinkle red sugar crystals on top. Refrigerate for at least 3 hours to set, or overnight for a firmer texture.
Step 7: Shape and Dish Up
Using a heart-shaped cookie cutter (2-3 inches wide), rinse it with hot water, dry it, and cut shapes closely together to yield around 20 pieces.
📌 Pin for later!
Storage Tips
After baking and assembling the Red Velvet Cheesecake, it is important to store it properly to maintain its freshness and flavor. Once the cheesecake has cooled completely, cover it loosely with plastic wrap or aluminum foil to prevent it from drying out in the refrigerator. Make sure the cover is not too tight to avoid squishing the delicate layers.
For longer storage, you can also transfer the cheesecake to an airtight container. Place a sheet of parchment paper between the cheesecake and the lid of the container to prevent any condensation from dripping onto the dessert. This will help preserve the texture and presentation of the Red Velvet Cheesecake for a few days.
To serve the leftover cheesecake, simply remove it from the refrigerator and let it sit at room temperature for about 30 minutes before slicing and enjoying. This will allow the flavors to develop and the cheesecake to soften slightly for a perfect bite every time. Store any remaining slices in an airtight container in the refrigerator for up to 3-4 days for the best taste and texture.
Ingredient Substitutions
If you need to make substitutions for some ingredients in this Red Velvet Cheesecake recipe, there are a few options. For the red food coloring, you can use natural alternatives like beet juice or raspberry puree to achieve a similar vibrant color. Just keep in mind that the flavor might be slightly affected, so adjust accordingly. Additionally, to make this dessert a bit lighter, you can swap the cream cheese with a blend of ricotta cheese and a touch of sour cream, which can create a similar creamy texture with a slightly tangier flavor profile.
For those who prefer a gluten-free option, you can replace the all-purpose flour in the recipe with a gluten-free flour blend or almond flour. This substitution will work well in both the cake and cheesecake layers. Just make sure to adjust the quantities slightly if needed to maintain the right consistency in the batter. Remember that experimentation in the kitchen can lead to delicious discoveries, so feel free to tailor this recipe to suit your dietary preferences and taste preferences.
Serving Suggestions
For a creative serving suggestion, consider garnishing each slice of the Red Velvet Cheesecake with a sprinkle of red crystal sugar on top. This not only adds a touch of sparkle and elegance but also enhances the visual appeal of the dessert, making it even more irresistible. Another idea is to serve each slice with a dollop of whipped cream or a scoop of vanilla ice cream on the side to balance out the richness of the cheesecake and add a creamy element that complements the flavors perfectly. These simple yet thoughtful touches can elevate the overall presentation of the dessert and delight your guests with a visually stunning and delicious treat.
FAQs for Decadent Cheesecake-Stuffed Velvet Heart Cookies
Question?
What makes this Red Velvet Cheesecake stand out from regular cheesecakes?
Question?
Can I use other food colorings instead of red for this recipe?
Question?
How far in advance can I make this Red Velvet Cheesecake?
Question?
Can I substitute the greek yogurt with sour cream in this recipe?
Conclusion
As you embark on creating your own Sweet Velvet Hearts with Cheesecake, remember that the journey is just as rewarding as the final product. The careful balance of flavors, textures, and colors in this dessert truly make it a showstopper for any occasion. Whether you’re a seasoned baker or just starting out, the joy of sharing this delightful treat with loved ones is incomparable.
So take your time, enjoy the process, and savor every bite of these Sweet Velvet Hearts with Cheesecake. Let the magic of this dessert bring smiles and warmth to your gatherings, creating memories that will last a lifetime. After all, the heartwarming reactions and delighted faces around your table will be a testament to the love and care you put into creating this beautiful masterpiece.
📌 Pin for later!
Decadent Cheesecake-Stuffed Velvet Heart Cookies
“Indulge in the stunning beauty of Sweet Velvet Hearts with Cheesecake—a rich, vibrant red velvet base topped with velvety smooth cheesecake.”
Prep Time45 Minutes
Cook Time30 Minutes
Total Time75 Minutes
CuisineAmerican
Skill LevelEasy
Servings20 Servings (20 heart shapes)
Ingredients
Brownie Foundation
- 5 tablespoons butter (cut into 5 chunks)
- 4 ounces chopped semi-sweet chocolate
- 1/4 teaspoon salt
- 1/2 cup tightly packed dark brown sugar
- 1 fluid ounce red food coloring (one small bottle usually works)
- 1/2 cup all-purpose flour
- 2 whole eggs
- 1/4 teaspoon baking powder
Cheesecake Mixture
- 2 whole eggs
- 8 ounces cream cheese, softened
- 1 tablespoon all-purpose flour
- 2/3 cup granulated sugar
- 1/4 cup unflavored greek yogurt
- 1 tablespoon vanilla extract
Finishing Touch
- Red crystal sugar sprinkles
Instructions
-
Get Ready: Preheat the oven to 350°F (175°C) and grease a 9-inch round springform pan with butter or shortening.
-
Create Brownie Base: 1. Boil water in a pot. In a separate bowl, combine flour, baking powder, and salt. Place butter and chocolate in a heat-safe bowl over the simmering water, stirring occasionally until melted. Allow it to cool slightly. Mix in sugar, eggs, and red food coloring. Gently fold in the dry ingredients until smooth.
-
Whip Up Cheesecake Mix: Start the stand mixer with the paddle attachment. Combine cream cheese and yogurt until light and creamy. Blend in sugar and vanilla until smooth. Add eggs one at a time, ensuring each is fully incorporated. Mix in flour until smooth.
-
Stack It Up: Set aside 1/4 cup of brownie mix. Spread the remaining mix evenly in a greased pan. Layer the cheesecake mix on top. Sprinkle the reserved brownie mix over the layers. Use a butter knife to swirl and create marble patterns.
-
Cook It: Bake in a preheated oven for approximately 30 minutes, or until the cheesecake is firm and the edges turn golden.
-
Let It Rest: Allow the cheesecake to cool for 30 minutes, then remove from the springform pan. Sprinkle red sugar crystals on top. Refrigerate for at least 3 hours to set, or overnight for a firmer texture.
-
Shape and Dish Up: Using a heart-shaped cookie cutter (2-3 inches wide), rinse it with hot water, dry it, and cut shapes closely together to yield around 20 pieces.