Follow Me On Social Media!
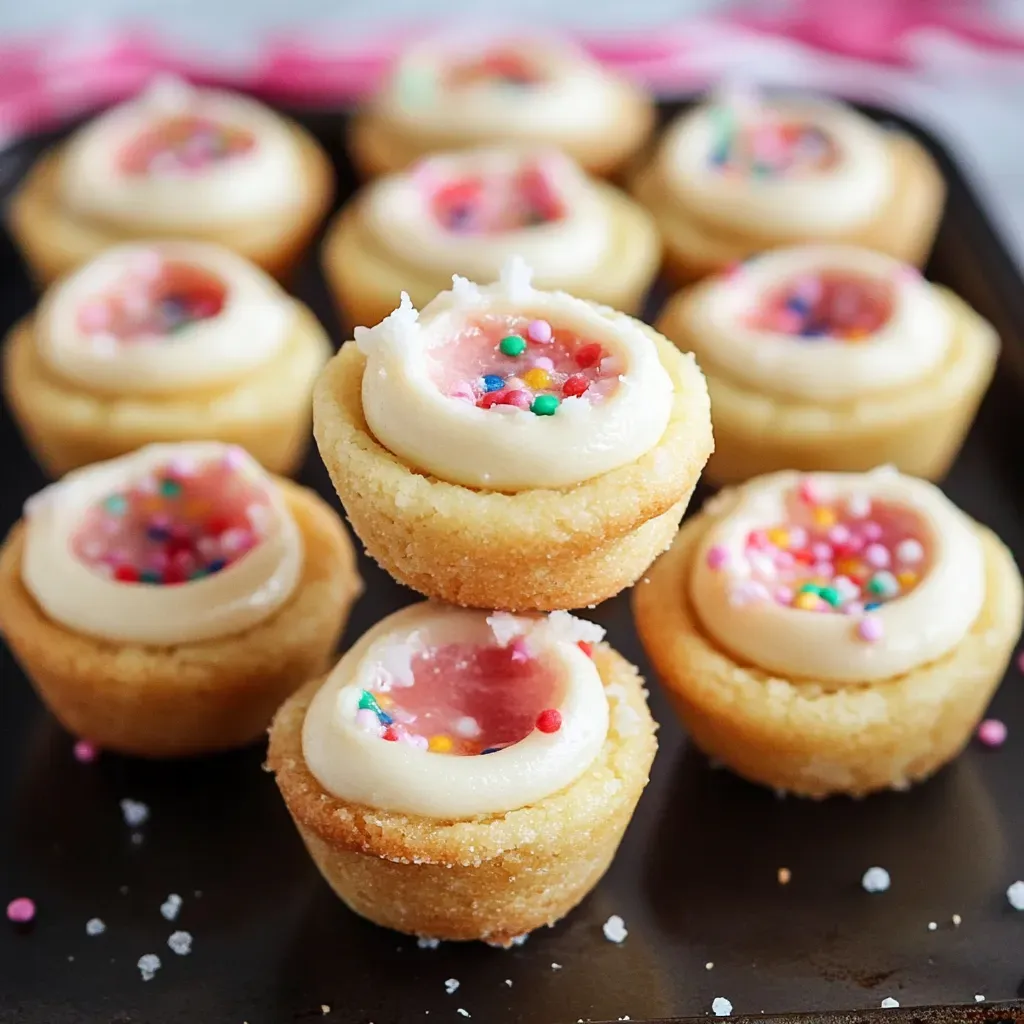
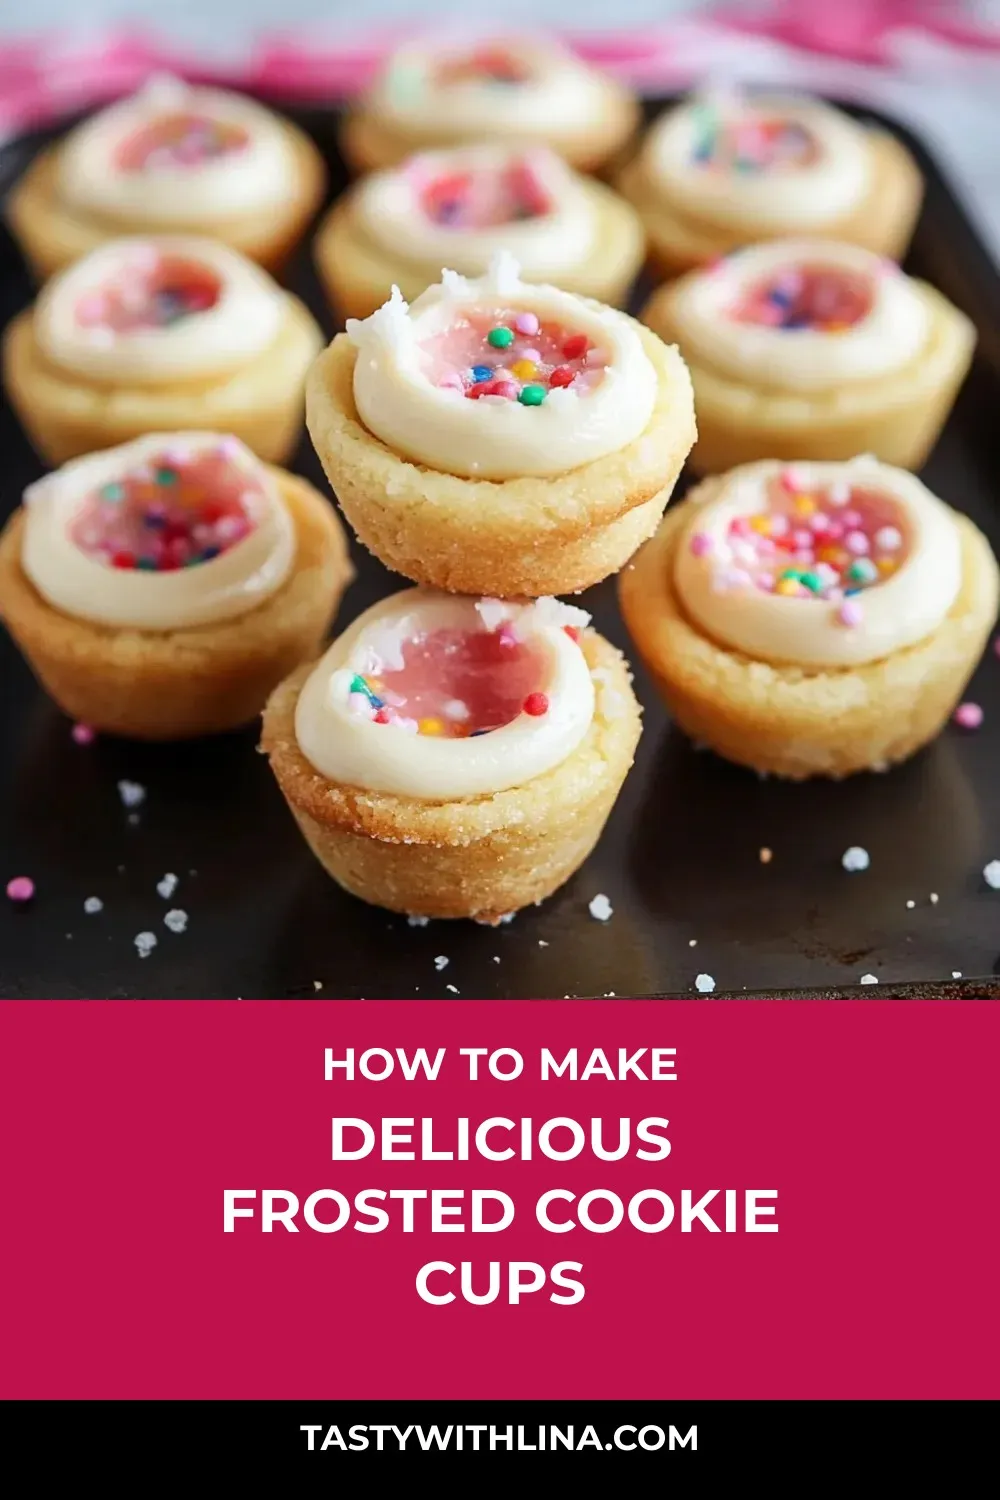
Welcome to a delightful treat that will satisfy your sweet cravings – Sweet Cookie Frosting Cups! These charming little cups bring together the best of both worlds: buttery sugar cookies and luscious frosting. Perfect for parties or simply indulging your sweet tooth, these bite-sized goodies are sure to impress.
Creating these Sweet Cookie Frosting Cups is a labor of love, requiring just the right touch to achieve that ideal cup shape. The combination of softened butter, sugar, and a hint of vanilla results in a cookie base that perfectly complements the creamy frosting. The final touch of colorful sprinkles adds a fun and festive flair to these dainty treats.
Whether you’re hosting a gathering or looking for a special treat, these Sweet Cookie Frosting Cups are sure to be a hit. Take the time to craft each cup with care, and you’ll be rewarded with a delightful dessert that brings joy to all who taste it. So, roll up your sleeves, grab your ingredients, and let’s whip up a batch of these irresistible Sweet Cookie Frosting Cups together!
Quick Benefits
- Versatile treat for gatherings and events
- Easy to make with basic ingredients
- Can be stored for later enjoyment, frozen for up to 3 months
- Customizable with food coloring and sprinkles
Why You’ll Love This Delicious Frosted Cookie Cups Recipe
- Versatile Treat: Perfect for gatherings, parties, or a fun snack at home.
- Buttery Cookie Base: The cookie cups have a rich, buttery flavor that complements the sweet frosting.
- Creamy Frosting Filling: The smooth and creamy frosting adds a delightful contrast to the crunchy cookie cups.
- Customizable: Add almond extract or food coloring to customize the flavor and appearance to your liking.
- Easy to Store: Can be stored at room temperature for up to 3 days or frozen for up to 3 months for future enjoyment.
- Simple Ingredients: Basic pantry staples come together to create a delicious and impressive treat.
- Delightful Presentation: These cute cookie cups are sure to bring joy and smiles to anyone who tries them.
- Attention to Detail: Following the recipe’s tips on dough coolness and frosting thickness ensures a perfect result every time.
Ingredients for Delicious Frosted Cookie Cups
Sugar Cookie Dough
- 2 cups flour
- 1 teaspoon vanilla
- 1/2 teaspoon baking powder
- 3/4 cup sugar
- 1 egg
- 3/4 cup softened salted butter
- 1/4 teaspoon almond extract if you want
Buttercream Frosting
- sprinkles if you want
- 1/2 teaspoon vanilla
- 1/4 cup softened salted butter
- food coloring if you want
- 1 1/3 cups powdered sugar
- 1 tablespoon milk or heavy cream
Pro Tips for Delicious Frosted Cookie Cups
To achieve the perfect cup shape for your Sweet Cookie Frosting Cups, make sure to chill the dough until just the right coolness before shaping. This will help the cookies hold their form while baking, creating a nice little well for the frosting.
When preparing the frosting, whip the softened butter until fluffy and gradually add sifted powdered sugar and heavy cream. The key is to reach a consistency that is firm enough to hold its shape but still soft enough to be piped through a tip. Using a star tip for piping will give your frosting a decorative finish.
For storing, keep the unfrosted cookie cups in a freezer container with parchment paper between layers if planning to save them for later enjoyment. They can be stored frozen for up to 3 months. This versatile treat is perfect for any occasion and will surely bring joy to those who taste them.
How to Make Delicious Frosted Cookie Cups
Step 1: Prepare
Preheat the oven to 350F. Coat 36 mini muffin cups with non-stick cooking spray.
Step 2: Make Cookie Base
Combine the softened butter and sugar in a stand mixer bowl until smooth and fluffy.
Step 3: Add Wet Ingredients
Combine the egg, vanilla, and almond extract (if using).
Step 4: Add Dry Ingredients
Add the baking powder and flour, then mix until combined.
Step 5: Form Cups
Take rounded tablespoons of dough (approximately 1″ balls), roll into balls, and place one in each muffin cup. Gently flatten with fingers without creating a cup shape.
Step 6: Bake
Cook for approximately 10 minutes or until the edges are golden brown.
Step 7: Shape Cups
Use a bottle cap to create a cup shape in each warm cookie. Allow cookies to cool in the pan for 5 minutes before transferring to a wire rack.
Step 8: Make Frosting
Cream butter in a mixer until smooth. Add powdered sugar, vanilla, and milk or cream; mix until smooth. Adjust consistency with more milk if needed. Optionally, add food coloring.
Step 9: Assemble
Using a piping bag or ziplock bag, fill with frosting and pipe into each cooled cookie cup. Optionally, sprinkle with sprinkles.
📌 Pin for later!
Storage Tips
Once you have made the sweet cookie frosting cups, it is important to store them correctly to maintain their freshness. If you plan on serving the treats within the next 3 days, you can keep them at room temperature in a sealed container. Make sure the cups have cooled completely before adding the frosting to prevent it from melting.
If you want to store the cookie cups for a longer period, you can freeze them. Pack the unfrosted cups carefully in a freezer container with parchment paper between layers to prevent sticking. The cookie cups can stay good in the freezer for up to 3 months. When you’re ready to enjoy them, simply thaw the cups in the refrigerator or at room temperature before adding the frosting.
To make the creamy frosting, whip softened butter until fluffy and gradually mix in sifted powdered sugar and heavy cream until you achieve the desired thickness. Transfer the frosting to a piping bag with a star tip or a plastic bag with a small corner cut off to easily decorate the cookie cups. By following these storage tips, you can ensure that your sweet cookie frosting cups stay delicious and ready to enjoy whenever you like.
Ingredient Substitutions
For a dairy-free option, you can substitute the softened salted butter with margarine or a dairy-free butter alternative. This swap will work well for both the cookie base and the frosting. Similarly, if you prefer a healthier option, you can use coconut oil as a replacement for the butter in the cookie dough. Just make sure the coconut oil is in solid form when adding it to the recipe.
If you’re looking to make the frosting a bit lighter, you can swap the heavy cream with coconut cream or any plant-based milk like almond or soy milk. These alternatives will still provide a creamy texture to the frosting without the heaviness of heavy cream. Additionally, if you want to add a different flavor profile to the frosting, you can experiment with different extracts such as lemon, orange, or peppermint instead of vanilla. This can give your frosting a unique and refreshing taste that complements the sweetness of the cookie cups.
Serving Suggestions
For a fun and colorful presentation with these Sweet Cookie Frosting Cups, consider piping the frosting in different pastel colors and topping them off with a variety of sprinkles for a vibrant and eye-catching dessert spread. You can even customize the frosting colors and sprinkle combinations to match the theme of your event or gathering, making them not only delicious but also visually appealing.
To add an extra touch of elegance and sophistication to these mini treats, consider dusting the cookie cups with a sprinkle of edible glitter or gold dust before serving. This simple addition will elevate the presentation and make them perfect for special occasions like bridal showers, birthday parties, or holiday celebrations. The shimmering finish will make these Sweet Cookie Frosting Cups truly stand out and impress your guests with their beauty and taste.
FAQs for Delicious Frosted Cookie Cups
Can I omit the almond extract in the cookie dough?
Yes, you can omit the almond extract if you prefer. The recipe will still turn out delicious with just the vanilla extract.
Can I use unsalted butter for the frosting?
Yes, you can use unsalted butter for the frosting if that’s what you have on hand. Just add a pinch of salt to balance the flavors if needed.
How can I store the unfrosted cookie cups for later use?
To store the unfrosted cookie cups for later use, pack them carefully in a freezer container with parchment paper between layers. They can be frozen for up to 3 months. Make sure to thaw them before frosting.
Can I use different food coloring for the frosting?
Yes, you can use different food coloring to customize the frosting for your cookie cups. Gel food coloring works best as it won’t alter the consistency of the frosting.
Conclusion
Congratulations on mastering the art of creating these delightful Sweet Cookie Frosting Cups! Your dedication to perfecting the dough and ensuring the ideal cup shape truly shines through in each bite of these buttery treats filled with creamy frosting.
Whether you’re preparing these Sweet Cookie Frosting Cups for a special occasion or simply to spread joy on any given day, the love and effort you put into making them will undoubtedly be appreciated by all who get to enjoy them. Remember, the small details in the baking process make all the difference in the final presentation and taste.
So, keep spreading sweetness and creating moments of delight with your Sweet Cookie Frosting Cups. Your passion for baking and sharing these delightful treats is sure to bring smiles and warm hearts wherever they go. Happy baking, and may your Sweet Cookie Frosting Cups continue to be a source of joy and deliciousness for all who indulge in them!
📌 Pin for later!
Delicious Frosted Cookie Cups
“Delightful sweet cookie cups filled with creamy frosting – a charming treat for any occasion, showcasing the perfect balance of flavors and textures.”
Prep Time30 Minutes
Cook Time12 Minutes
Total Time42 Minutes
CuisineAmerican
Skill LevelEasy
Servings35 Servings (35 cookie cups)
Ingredients
Sugar Cookie Dough
- 2 cups flour
- 1 teaspoon vanilla
- 1/2 teaspoon baking powder
- 3/4 cup sugar
- 1 egg
- 3/4 cup softened salted butter
- 1/4 teaspoon almond extract if you want
Buttercream Frosting
- sprinkles if you want
- 1/2 teaspoon vanilla
- 1/4 cup softened salted butter
- food coloring if you want
- 1 1/3 cups powdered sugar
- 1 tablespoon milk or heavy cream
Instructions
-
Prepare: Preheat the oven to 350F. Coat 36 mini muffin cups with non-stick cooking spray.
-
Make Cookie Base: Combine the softened butter and sugar in a stand mixer bowl until smooth and fluffy.
-
Add Wet Ingredients: Combine the egg, vanilla, and almond extract (if using).
-
Add Dry Ingredients: Add the baking powder and flour, then mix until combined.
-
Form Cups: Take rounded tablespoons of dough (approximately 1″ balls), roll into balls, and place one in each muffin cup. Gently flatten with fingers without creating a cup shape.
-
Bake: Cook for approximately 10 minutes or until the edges are golden brown.
-
Shape Cups: Use a bottle cap to create a cup shape in each warm cookie. Allow cookies to cool in the pan for 5 minutes before transferring to a wire rack.
-
Make Frosting: Cream butter in a mixer until smooth. Add powdered sugar, vanilla, and milk or cream; mix until smooth. Adjust consistency with more milk if needed. Optionally, add food coloring.
-
Assemble: Using a piping bag or ziplock bag, fill with frosting and pipe into each cooled cookie cup. Optionally, sprinkle with sprinkles.